Reverse Engineering (RE)
Reverse Engineering is the process of replicating a design by physically examining and measuring an existing item to develop the technical data necessary to reproduce the item functionally and dimensionally. In other words, it is the process of extracting information about an item from the item itself. The Reverse Engineering process starts with the requirement of having sufficient stock available to develop a package from. Reverse Engineering is relatively expensive and time consuming, so please consider it while stock is still available. Reverse Engineering is usually less expensive than qualifying a new design, as the current design has already been proven and has many hours on the end item to prove the reliability of the design.
There are Three Different Reverse Engineering Programs that DLA Weapons Support (Richmond):
Domestic companies purchase, borrow, or inspect parts in DLA’s stock to create Reverse Engineering Source Approval Request packages. This is done at no cost to the government. The companies retain the data rights to the developed package. If approved, the company can become a new source.
• Reverse Engineering Technical Data Initiative (RETDI)
A funded reverse engineering initiative that allows the government to retain the data rights to the subsequent Technical Data Package (TDP.) A vendor gets awarded a technical task order to perform work assisting reverse engineering projects and provides the government a manufacturable TDP. The TDPs go through engineering TDP approval and validation that can include prototype and fit check. Funds for this are limited.
• Internal Reverse Engineering Team
We have internal resources to perform reverse engineering projects on mechanical parts and assemblies that can be performed utilizing the equipment we have on-site. Some testing can go through the DLA Product Testing Center labs to assist with material analysis. These TDPs undergo engineering TDP approval and validation, possibly including mockup and fit check.
Reverse Engineering Assistance Request
To submit your Reverse Engineering requests directly use the new Value Engineering Assistance Request form button below:
► First time users must first register through AMPS (PDF)

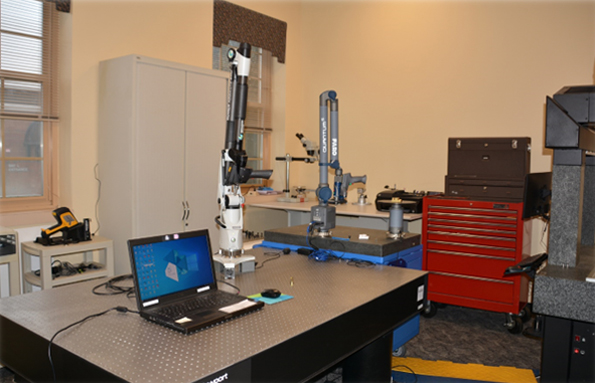
Our small metrology lab on-site at the Defense Supply Center Richmond (DSCR)
Our Team has many tools to help in these tasks:
Computer Aided Design (CAD)
Computer Aided Design software packages allow engineers to develop drawings and models. These drawings can be 2-Dimensional, 3-Dimensional, or even solid models.
Coordinate Measuring Machine (CMM)
A Coordinate Measuring Machine is an automated measurement tool that can measure complex surfaces, such as an airfoil. Measurement accuracies are better than 0.0003 inches. Our CMM can accurately generate most of the measurement data needed to create a CAD drawing or a solid model.
Measurement Tools
Value Engineering has a wide range of measurement tools such items as calipers, micrometers, and digital protractors.
Gauges
A gauge is a standard for measuring dimensions (e.g., thread gauges).
Surface Roughness Tester
A surface roughness tester is a tool that is used to determine the surface finish of a part. Different surface finishes have a cost associated with them. The smoother finishes are more expensive to produce.
If we do not have the tools on-hand to identify characteristics of an item, then we can utilize the DLA Product Test Centers to obtain test reports of the desired characteristics.
Our Value Engineering staff has the expertise to apply these tools to reverse engineering tasks, produce quality technical data packages, and finished parts that will suit the need.